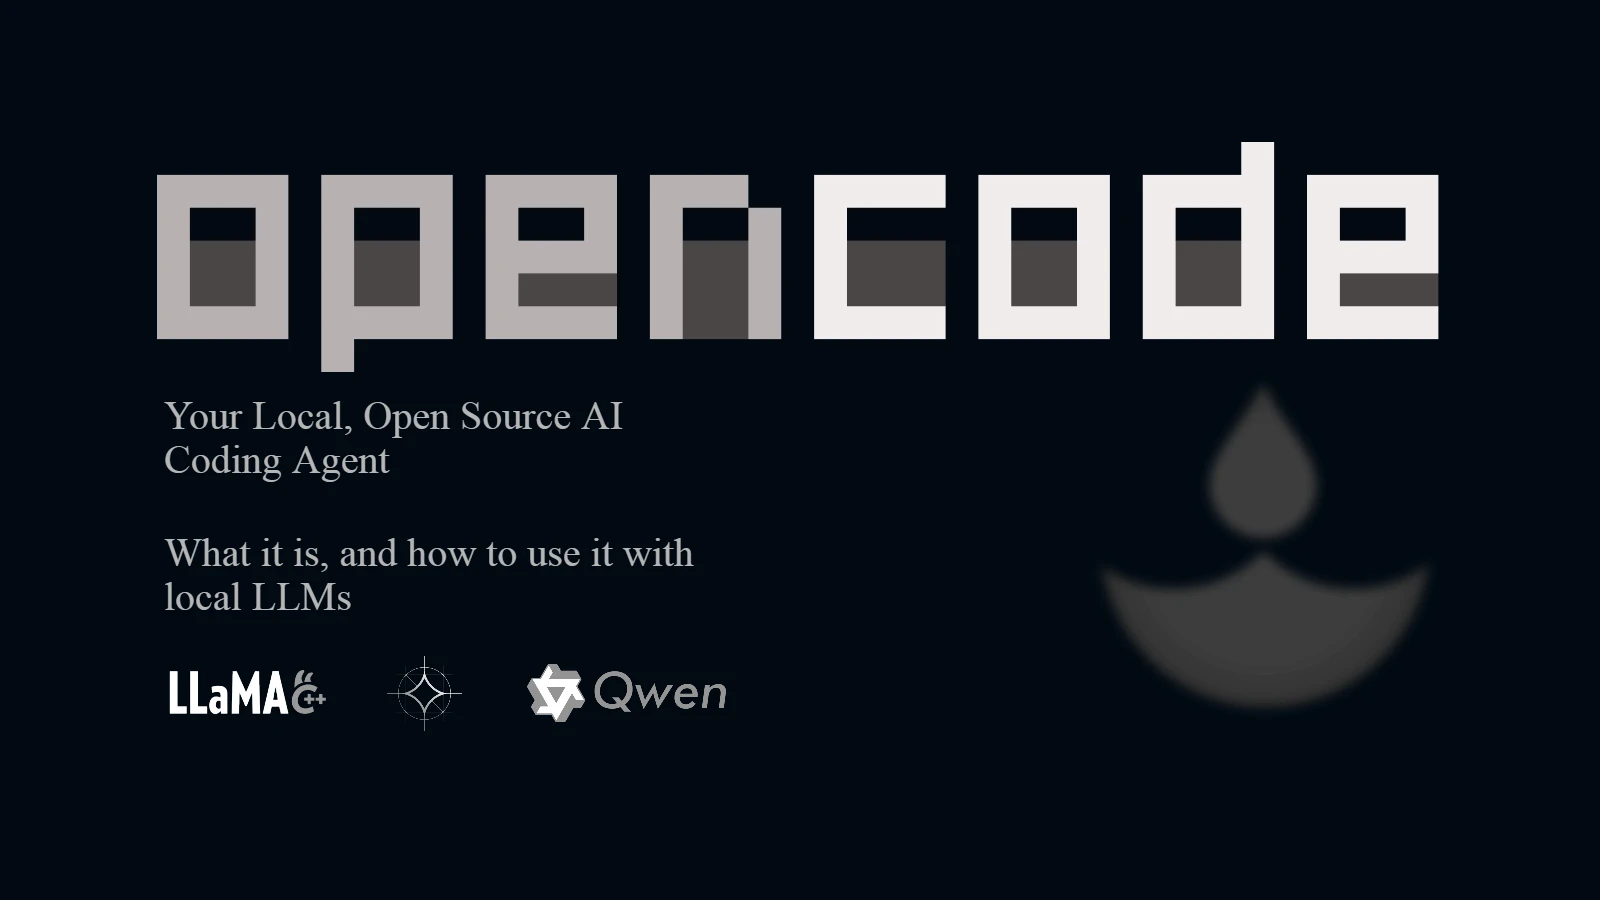
OpenCode: Your Open Source AI Coding Agent
(You should probably skip forward to the Installation part if that is the part you are already interested in, also if you have any questions you can contact us and ask for help on any one of our socials, we will be happy to help you and modify this post so that others will also benefit from it.)
Most of you have probably heard of, if not using, an AI coding agent such as Claude Code, OpenAI's Codex, or OpenCode. They are wonderful tools that take away one of the few joys we developers have left. One of the oldest traditions we had from the stone age of StackOverflow days. Our precious... copy and paste.
You just tell it what to do and not only does it hallucinate 200 lines of code calling a deprecated, or even better, non-existent method; now it also has permissions to write them into your codebase by itself without you having to do the manual labour of pressing Ctrl+C / Ctrl+V!
Besides the hallucinations, a coding agent is a very good tool to write boilerplate code. Or any kind of code that you could've found otherwise in a few google searches on GitHub/StackOverflow. It saves you the time and the hassle of having to read through documentation you would go without using, or the 20 tech-blogs talking about "best libraries to use for ...." with so many ads that you can't even read the text.
But these were not the benefits of a coding agent, these were the benefits of LLMs in general. What coding agents enable you to do is just chat about a file, and it will go and read it from your filesystem by itself without you having to copy paste information for its context. Tell it to generate a README.md for your new project and it will simply do it after using bash commands to read your code.
It would be good to have an AGENTS.md file describing the general structure of the codebase for these to work most efficiently but it is still less work than having to copy/paste code snippets into your chat client every now and then.
It is like having a shortcut in your terminal for any kind of boilerplate code you may have, code that you already know how to write but don't feel like writing it. Code which can be described accurately and shorter than the code snippet to be generated itself.
So then, if Claude Code/Codex/Github Copilot agents are this good, why isn't every developer already using these in their workflow?
Compute is Not Free, Tokens are Costly
While tools like Codex and Claude Code are incredible for development, they are very costly. Their free tiers end very quickly especially at medium to larger scale projects. Which, although not too expensive for developers from first world countries, it is found extremely expensive in others.
On top of that, these tools are closed source (despite Claude Code's source code being leaked this year and now one public forks existing called claw-code which is the fastest GitHub repository to surpass 100k stars)
And on top of these, some developers may simply not feel comfortable sharing their source code with third parties.
When you should NOT be using coding Agents
LLMs are still far from perfect when it comes to any topic at all. They make mistakes (almost every LLM chat interface to exist has this written on it somewhere). You should not use coding agents on critical infrastructure. And you must not deploy any code to production that you don't quite know the purpose of. Like the IBM training manual from 1979 says, "A computer can never be held accountable, therefore a computer must never make a management decision.". It wont be the AI that is kept accountable if a vibecoded app leaks sensitive user information.
OpenCode: Agentic Code Generation, but You Pick The Model
OpenCode is an alternative to tools like Claude Code and Codex, that enables you to bring your own model instead of using cloud based LLMs, so you can prefer to keep your data in your own device. If you still want to use cloud based models, you can! It still supports any open-ai compatible endpoints and more (such as Claude).
Coding locally with models like Qwen3-Coder-Next you can get near-same quality as cloud LLM models for programming, although it is a quite heavy for local development for many people.

You can use llama.cpp to host an open-ai compatible api with your model and they can be fully offloaded to your AMD/Nvidia GPUs if you have enough VRAM, and if a GPU is not found on your system your CPU will be used without any configuration. If you face problems with AMD GPUs, you can try installing the llama.cpp Vulkan version which fixed the problem that I had with ROCm. Or if you have problems with any other version, Vulkan will probably work but use it as the last resort.
You could also use Ollama or LMStudio instead of llama.cpp for installing the models and creating a HTTP server for OpenCode to use, but in this post we will talk about llama.cpp and OpenCode because it was the least problematic and straightforward route amongst the ones I tried (with an RX9060 GPU).
For the quantized models I downloaded them from LMStudio's Huggingface, your model preference may change depending on what it is that you want to achieve, but all of the Gemma models have support for text, audio and visual inputs if you first want to test out the agent and local LLMs before downloading a larger model.
Both llama.cpp and OpenCode work well on windows and unix-like systems. OpenCode recommends using WSL for running OpenCode on Windows operating systems, however it worked without any problems when I ran it on git-bash myself on my Windows computer.
Installing and Setting up OpenCode with llama.cpp
Commands to install OpenCode are given on its website but to keep everything in one page I will let you know what command to use and where the config will be in, and the config you will need (very short) for the OpenCode to connect to your local llama.cpp server instead of OpenZen, and how to configure its permissions.
Installing OpenCode
I have not yet tried using OpenCode Desktop application, I did not see a good advantage to be using it when you can run OpenCode from your terminal in any IDE you are already using, as well as using the opencode web command to get a GUI instead of a TUI with opencode. They have an OpenCode extension for VsCode too and even without it (which I have not yet used) you can just open a new terminal window to run opencode in and get to work.
To install OpenCode, if you are in a unix-like system, just run:
curl -fsSL [https://opencode.ai/install](https://opencode.ai/install) | bash
If you are in a Windows system and you don't want to use WSL, you can either run the command above in git-bash, or you can download NodeJS for Windows with NPM and then run the command below, which will install opencode globally for your user:
npm i -g opencode-ai
And then you are almost done with the installation of OpenCode itself, however we need to create/edit the config file that OpenCode uses to determine where to access the LLM that it uses to code for you, also what permissions do you want it to have on your system.
Just place the following inside ~/.config/opencode/config.json
{
    "$schema": "https://opencode.ai/config.json",
    "model": "openai/local-model",
    "permission": {
        "*": "ask",
        "bash": "ask",
        "edit": "ask"
    },
    "provider": {
        "MODELNAME": {
            "baseURL": "http://127.0.0.1:8001/v1",
            "apiKey": "sk-no-key-required",
            "models": {
                "local-model": {
                    "options": {
                        "contextWindow": 8192
                    }
                }
            }
        }
    }
}
In the above config, it will work as-is if you continue following the tutorial, but you may want to change the contextWindow to match your model's context window or smaller depending on your computer specs, just play around with it until you are satisfied with the LLM performance and system use.
The base URL is going to be pointing to your llama.cpp server which runs whatever LLM you choose to download and run using it.
If you want to read about OpenCode's permission system more in depth, take a look at it here: OpenCode Config: Permissions, in the above config I set it to ask before doing anything. If you would like you can set it to "allow", "deny", or "ask" as you wish.
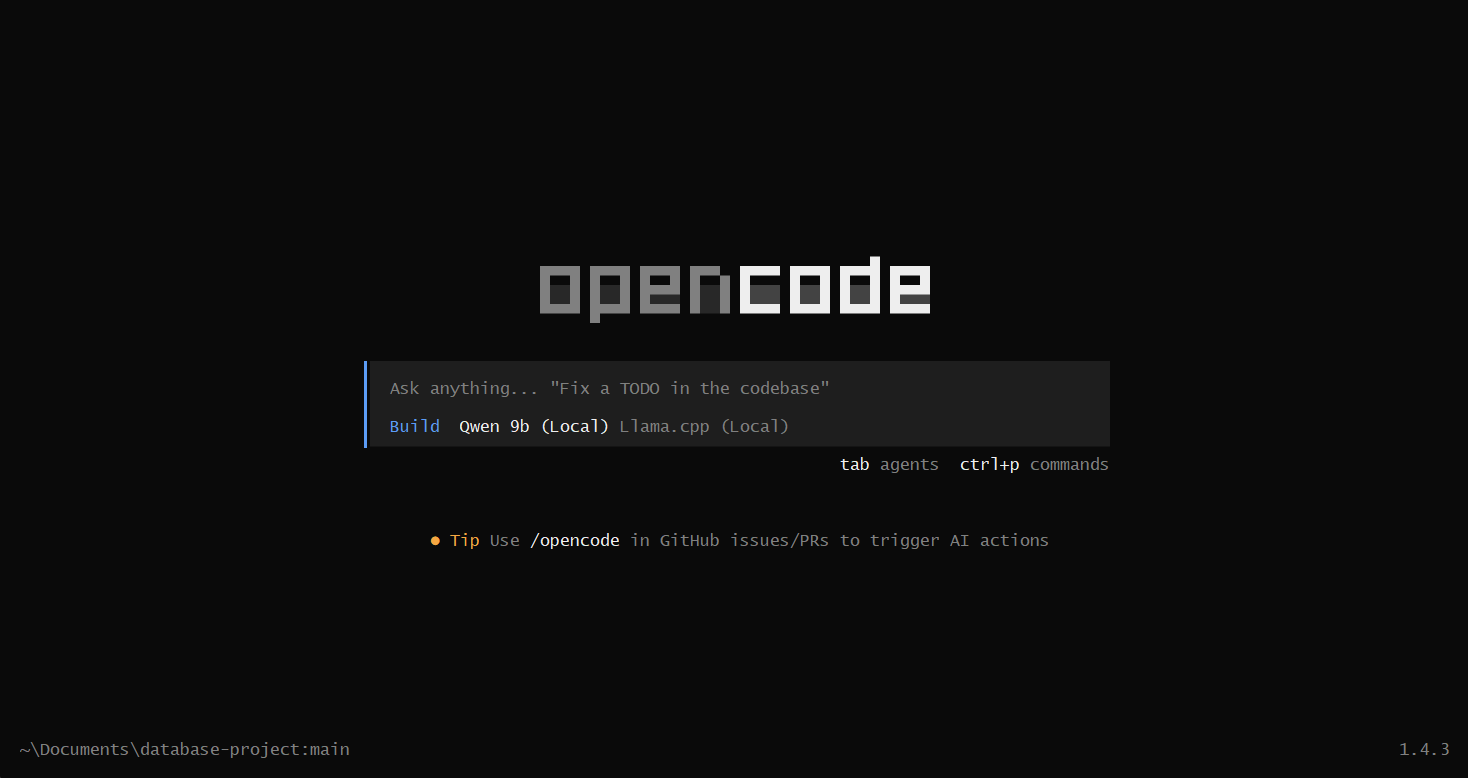
To start opencode you can just type opencode in the terminal within the project directory you want to be working on. It will give you a beautifully designed and very user friendly TUI (terminal user interface). You can look at what settings you have available using ctrl+p, select from prebuilt themes, add your API keys if you wish to use online models and so on...
Alternatively you can type opencode web to start a web UI that enables your model to work on your project, still with bash access, while you get to see it in web (which you can also control from other devices in your LAN, or remotely with services like Ngrok although I recommend you don't go that route at all due to security risks, you may accidentally give root access to your computer to everyone in the world who has internet access).
However keep in mind we have not yet hosted our model locally. If you try using OpenCode with the config you already have set up, you will see "Cannot connect to API: Unable to connect. Is the computer able to access the url..." under the prompt area. If you want to test it out before setting up the self hosted model, you will have to use one of the models that OpenCode provides you, or connect to other cloud LLM providers with your API keys.
In the terminal you can change your model using ctrl+p and navigating to Switch Model with your arrow keys, then picking whatever model it is you want to connect to. In opencode web, you can pick the model from bottom left side of the chat interface.
What model to choose?
You can compare the models you have in your mind using Artificial Analysis's coding index to see which one performed coding tasks better in their tests.
I have personally tested Gemma:E4B_4Q and Qwen3.5:9B and Qwen makes a massive difference in programming tasks compared to Gemma, of course there is a quantization and parameter difference but in my experience Qwen works very well, and if your system can handle it locally just go ahead and give it a try.
Gemma:E4B_4Q is good for image and audio processing though and I think it is very usable as part of a project pipeline rather than the programming part. I tested it (with very limited data) to see if it turns tabular image data into json properly, and it did perfectly so without any "prompt engineering" whatsoever.
OpenCode also comes with free cloud models you can use and the ability to connect to other paid/free cloud model providers using API keys which are really easy to configure and can be done from the TUI/GUI itself with a few keypresses by pasting the API key per provider you wish to use.
I will now assume you picked a model. (If you hadn't and you just want to test it out locally, go ahead and download Gemma:E4B-IT from LMStudio's huggingface) I recommend downloading gemma-4-E4B-it-Q4_K_M.gguf for now. Later it is very easy to change the model anyways if you are unsatisfied (which you may be) and want to switch to a higher performing model if you have a reasonably high performance system. Put the model in a directory you will remember because we will need its path after installing llama.cpp.
Installing llama.cpp and running the model
llama.cpp is an incredible tool that many other apps such as LMStudio also uses within their applications. It provides you with simple commands you can use to simply host a model with an open-ai compatible endpoint, chat with it using the web interface llama.cpp itself provides for you if you when hosting it, or chat with it from your terminal. It is completely open source with an MIT license.
You can build it yourself from source, but we will be explaining the less complicated way. Just go to llama.cpp github releases page and download whichever one your system supports from there.
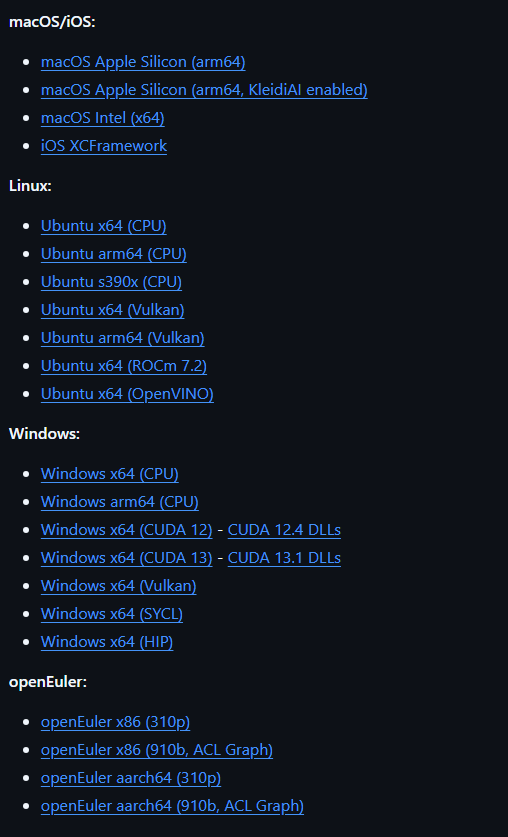
If you are on windows and using an AMD GPU, go ahead and install the one for windows with Vulkan. If you are in a linux system with an AMD GPU, check your ROCm version. If it matches 7.2, go ahead and install Ubuntu ROCm, if it is higher or below the 7.2 version (whatever version of ROCm is supported by llama.cpp as of you reading this post), you can still give it a try but if it doesn't work install Ubuntu's Vulkan version.
If you are on Windows or Linux with an NVIDIA GPU, find out what your CUDA version is and install the supported one from the releases page. If Cuda versions do not work and you can't fix it, go with Vulkan. But using ROCm (for AMD) or Cuda (for NVIDIA) will make your model run better. (they are more optimized for your specific GPU)
Vulkan works essentially with any GPU, so just use it if everything else fails.
Extract the zip to a location of your choice and add it to your path on whatever operating system you are using so you can execute commands no matter where you are on your system. Rest of the tutorial will assume your terminal is either opened in the extracted directory already or you added the directory to your path. (A quick google search on "How to add a directory to your path on [Windows|Linux|...] will give you a brief guide for your operating system)
Starting Your Local AI Server
Now that you have your preferred model downloaded and llama.cpp installed and accessible from your system path, we can finally spin up the server.
Open a new terminal window (you will need to keep this running in the background while you code) and execute the following command. Make sure to replace the path with wherever you saved your .gguf model file:
llama-server -m /path/to/your/model/gemma-4-E4B-it-Q4_K_M.gguf --port 8001 -ngl 99 -c 8192
Let's quickly break down what these flags actually do:
-m: Specifies the absolute or relative path to your downloaded model.--port 8001: Remember theconfig.jsonfile we set up earlier? We told OpenCode to look for an API on port 8001. This flag ensures yourllama.cppserver is listening exactly where OpenCode expects to find it.-ngl 99: This stands for "Number of GPU Layers". Setting it to a high number like 99 attempts to offload all the model's layers to your VRAM (GPU) for massively accelerated performance. If you don't have a GPU,llama.cppwill just gracefully fall back to CPU usage, though you can simply omit this flag entirely if you plan on strictly using your CPU.-c 8192: This defines the context window size.8192tokens is a safe, relatively lightweight starting point for local coding tasks. If you are working with multiple large files, you can increase this limit (up to the model's maximum supported context window), provided you have the VRAM/RAM to handle it. Make this match the number that you entered in the contextWindow config for OpenCode.
Hooking It All Together
Once you hit enter on the llama-server command, you'll see a wall of terminal output indicating that the model tensors are loading into your memory. Wait until the output settles and you spot a message similar to llama_server_listen: HTTP server is listening, hostname: 127.0.0.1, port: 8001.
Fun fact: You can also go to 127.0.0.1:8001 in your web browser to see a chat interface that is hosted by llama.cpp itself, without opencode.
Now, go back to the terminal inside your actual project directory and run:
opencode
Because of our configuration, OpenCode will bypass the default cloud endpoints and establish a connection directly with your local llama.cpp server.
You can now start prompting! Ask it to outline your README.md, generate that tedious boilerplate file you've been avoiding, or explain a messy chunk of legacy code. Since we set the permissions to "ask" in the config, it will politely prompt you for permission before running bash commands or modifying your files.
Final Thoughts
Coding agents are rapidly becoming an inevitable evolution of our daily workflows; much like intellisense, linters, and syntax highlighting were before them. While cloud-based coding agents are undeniably powerful, the ongoing token costs and the anxiety of shipping your proprietary source code to a third-party server can be massive deterrents.
By leveraging the combination of OpenCode and llama.cpp alongside incredibly capable open-weights models like Qwen3-Coder or Gemma, you get the absolute best of both worlds. You retain total control over your environment, your data stays entirely on your own hard drive, and the compute is practically "free" once your hardware is set up. No more scrolling on Instagram reels until your Claude Code limit refreshes (well, that you shouldn't really be doing in the first place).
The era of endlessly copy-pasting from StackOverflow might be drawing to a close, but the era of chatting directly with your filesystem is just getting started.
Happy local coding!